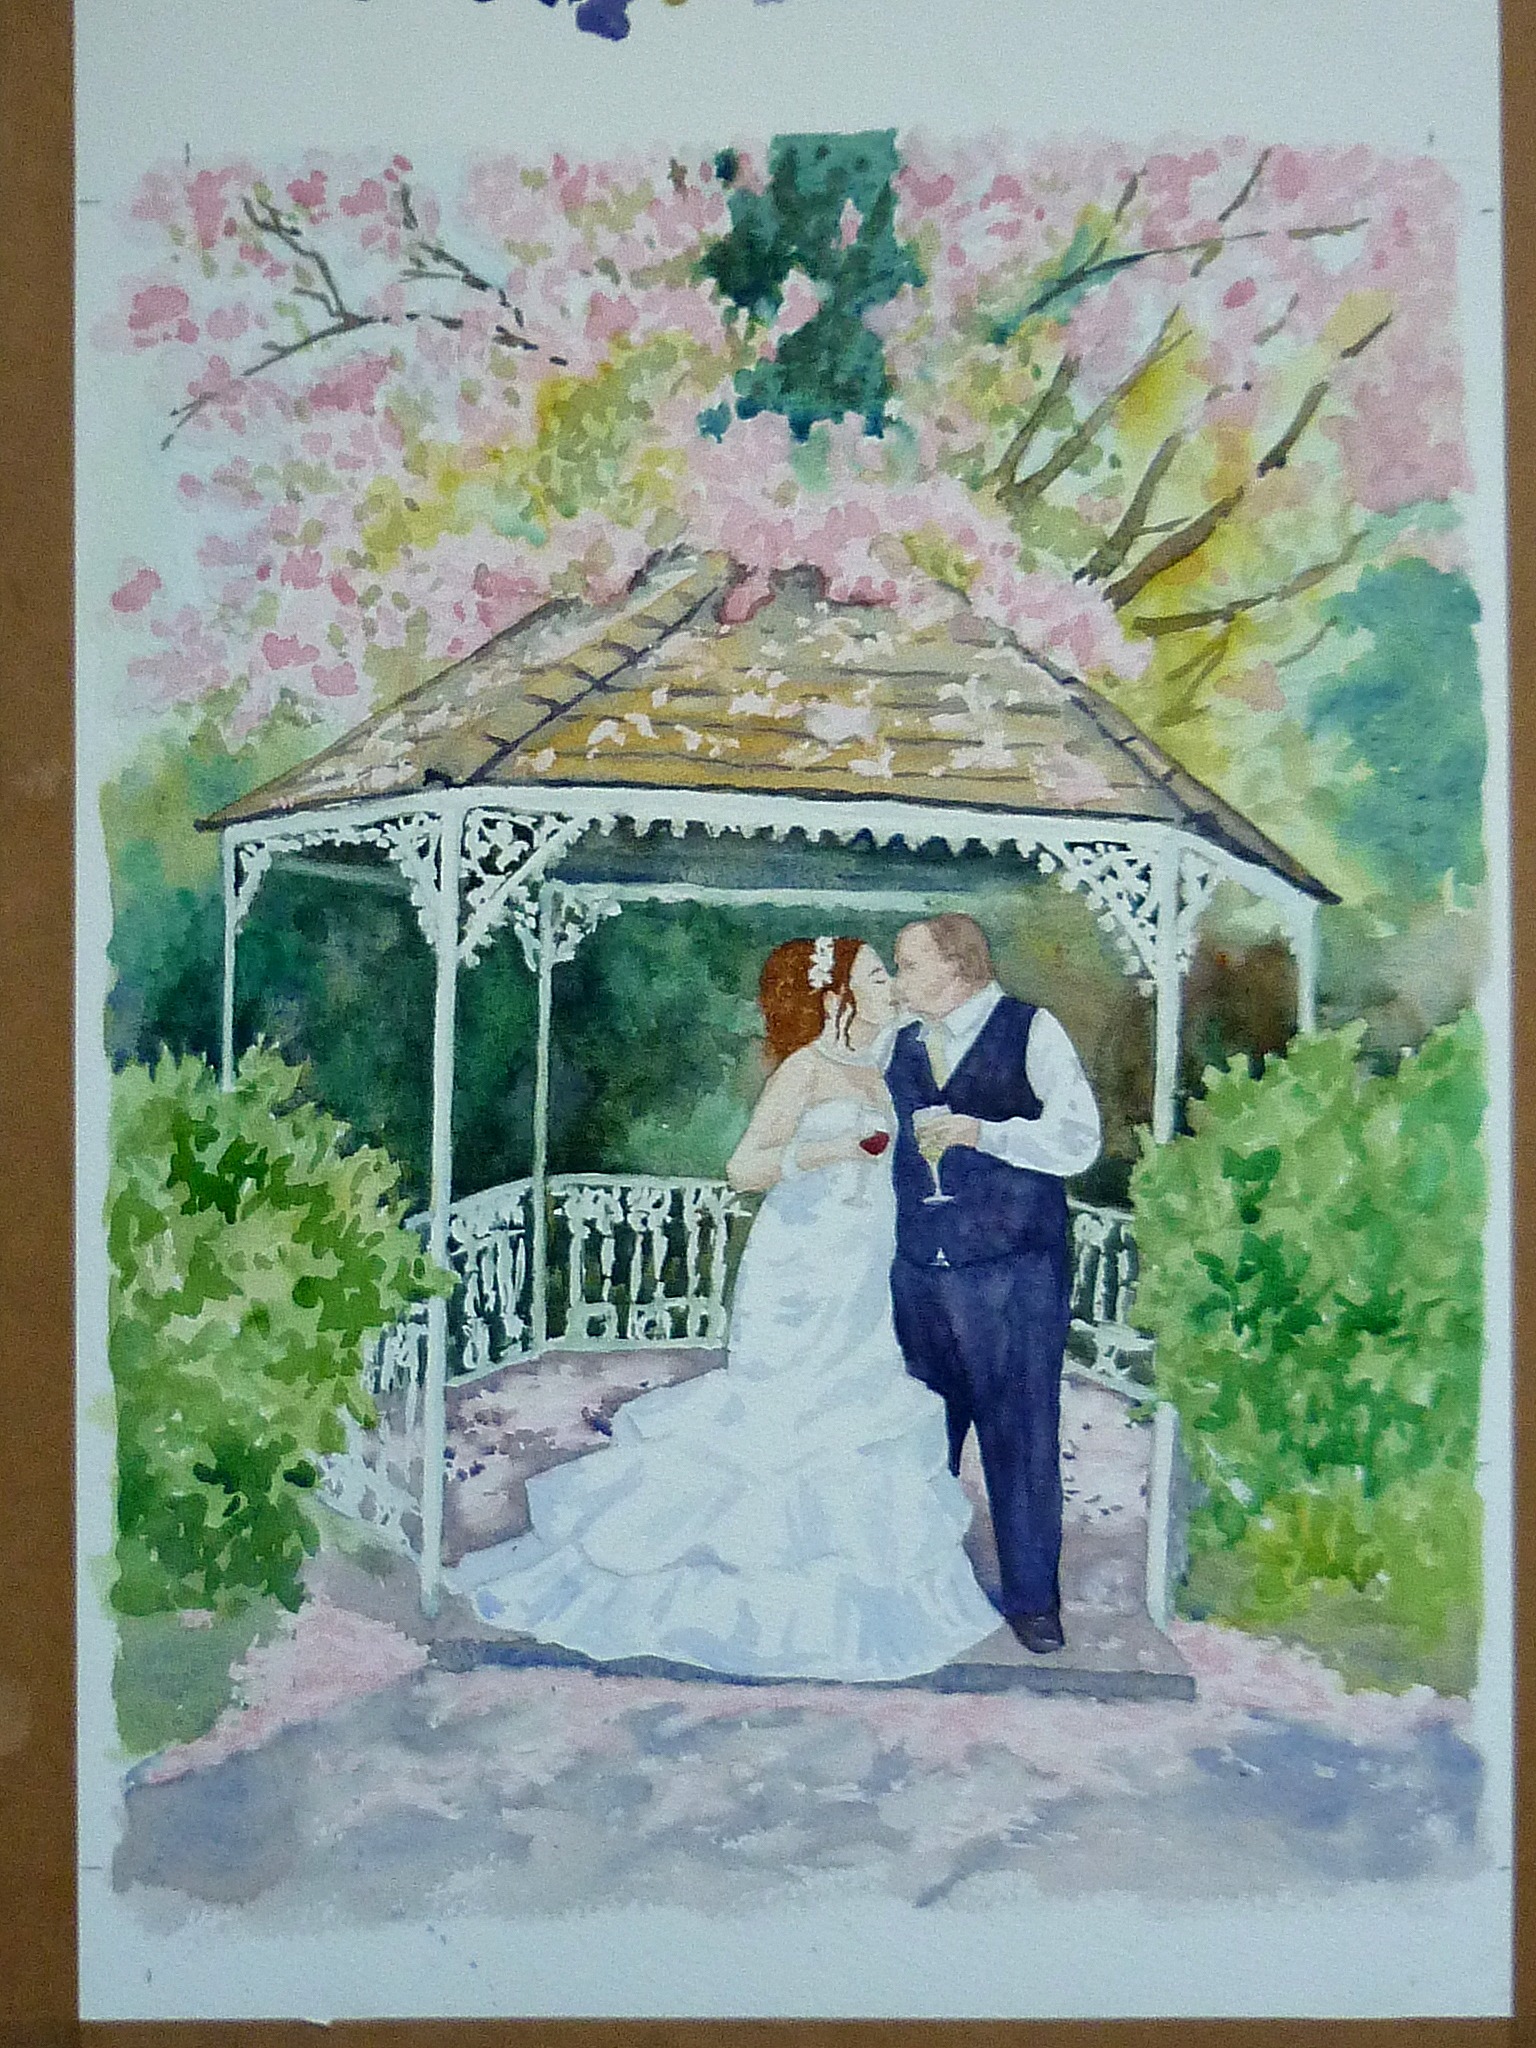
At long last its time to talk about this delightfully evocative painting I finished last week for the bride and groom.
As I’ve mentioned before, the minute I saw the happy couple under the white wrought iron gazebo with the cherry blossom above and around their feet I knew I wanted to paint this picture from my photo. And since I knew exactly what I wanted and how I wanted it done, I’ll show here the differe nt stages showing how I created this watercolour painting….
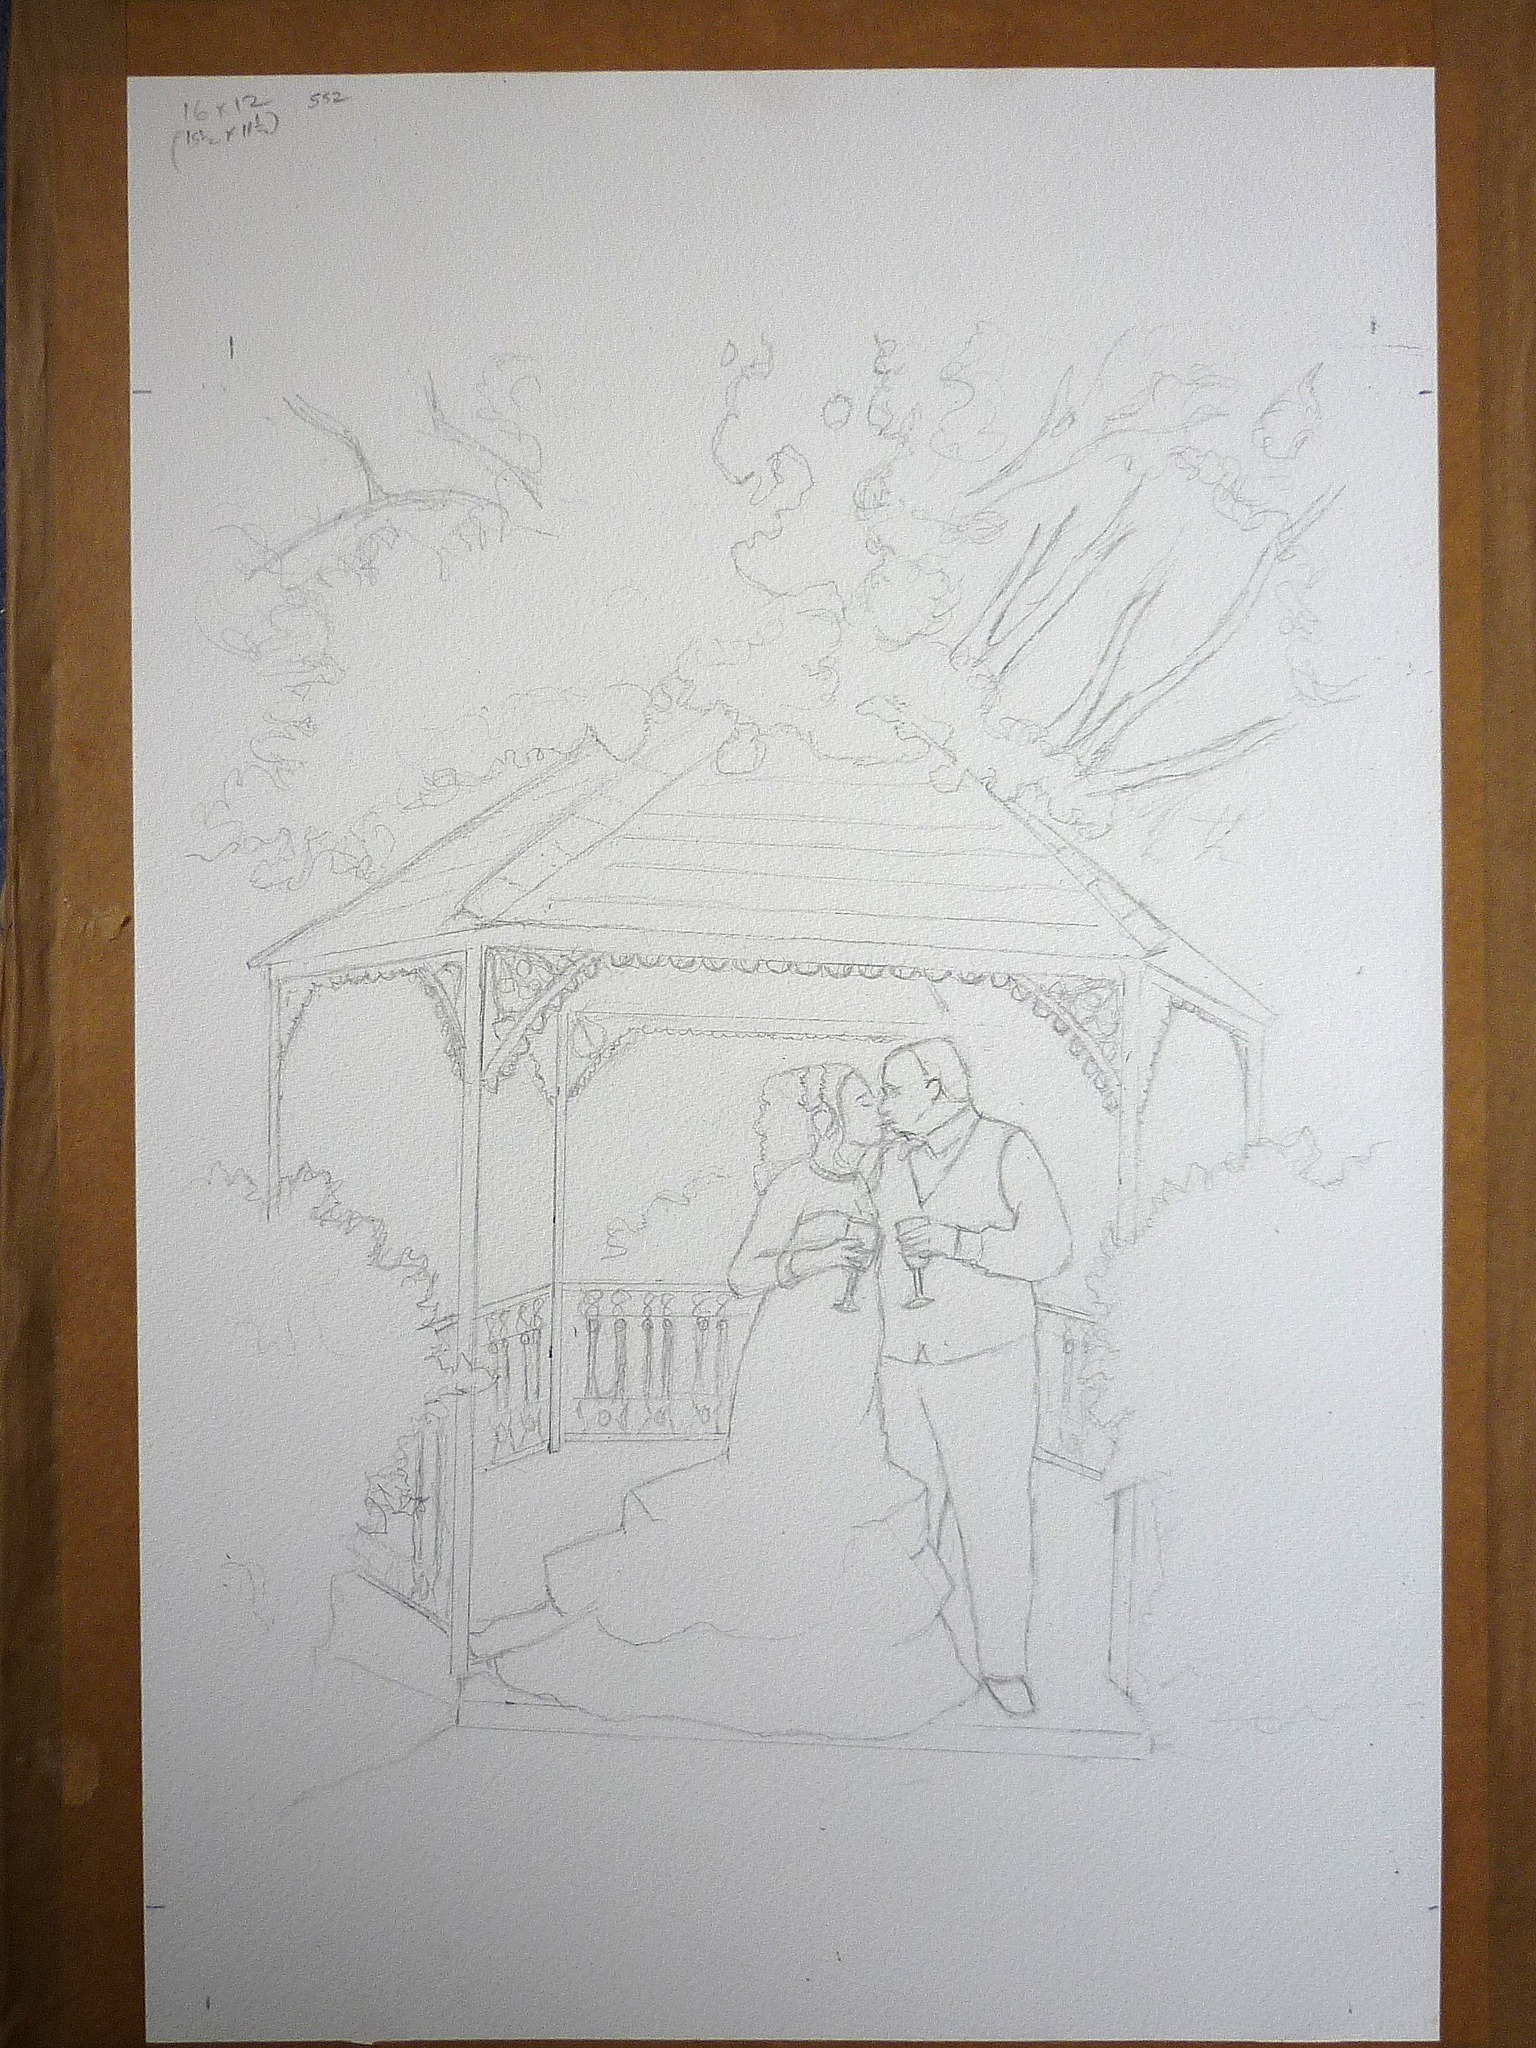
As you can see from the working photo, I knew I hardly needed to change anything at all for the painting other than removing the table that was behind them in the gazebo, it didn’t add to the picture in any way.
Firstly I put the watercolour paper on my work board and stuck it down with gummed tape to keep it firmly in place and stop the paper from buckling with the watercolours. I did a simple line drawing so I knew all the important lines of the gazebo which has a lot of detail in it, making sure the vertical pillars were parallel but I didn’t want to draw every tiny curl and line within the ironwork but rather hint at the shapes.
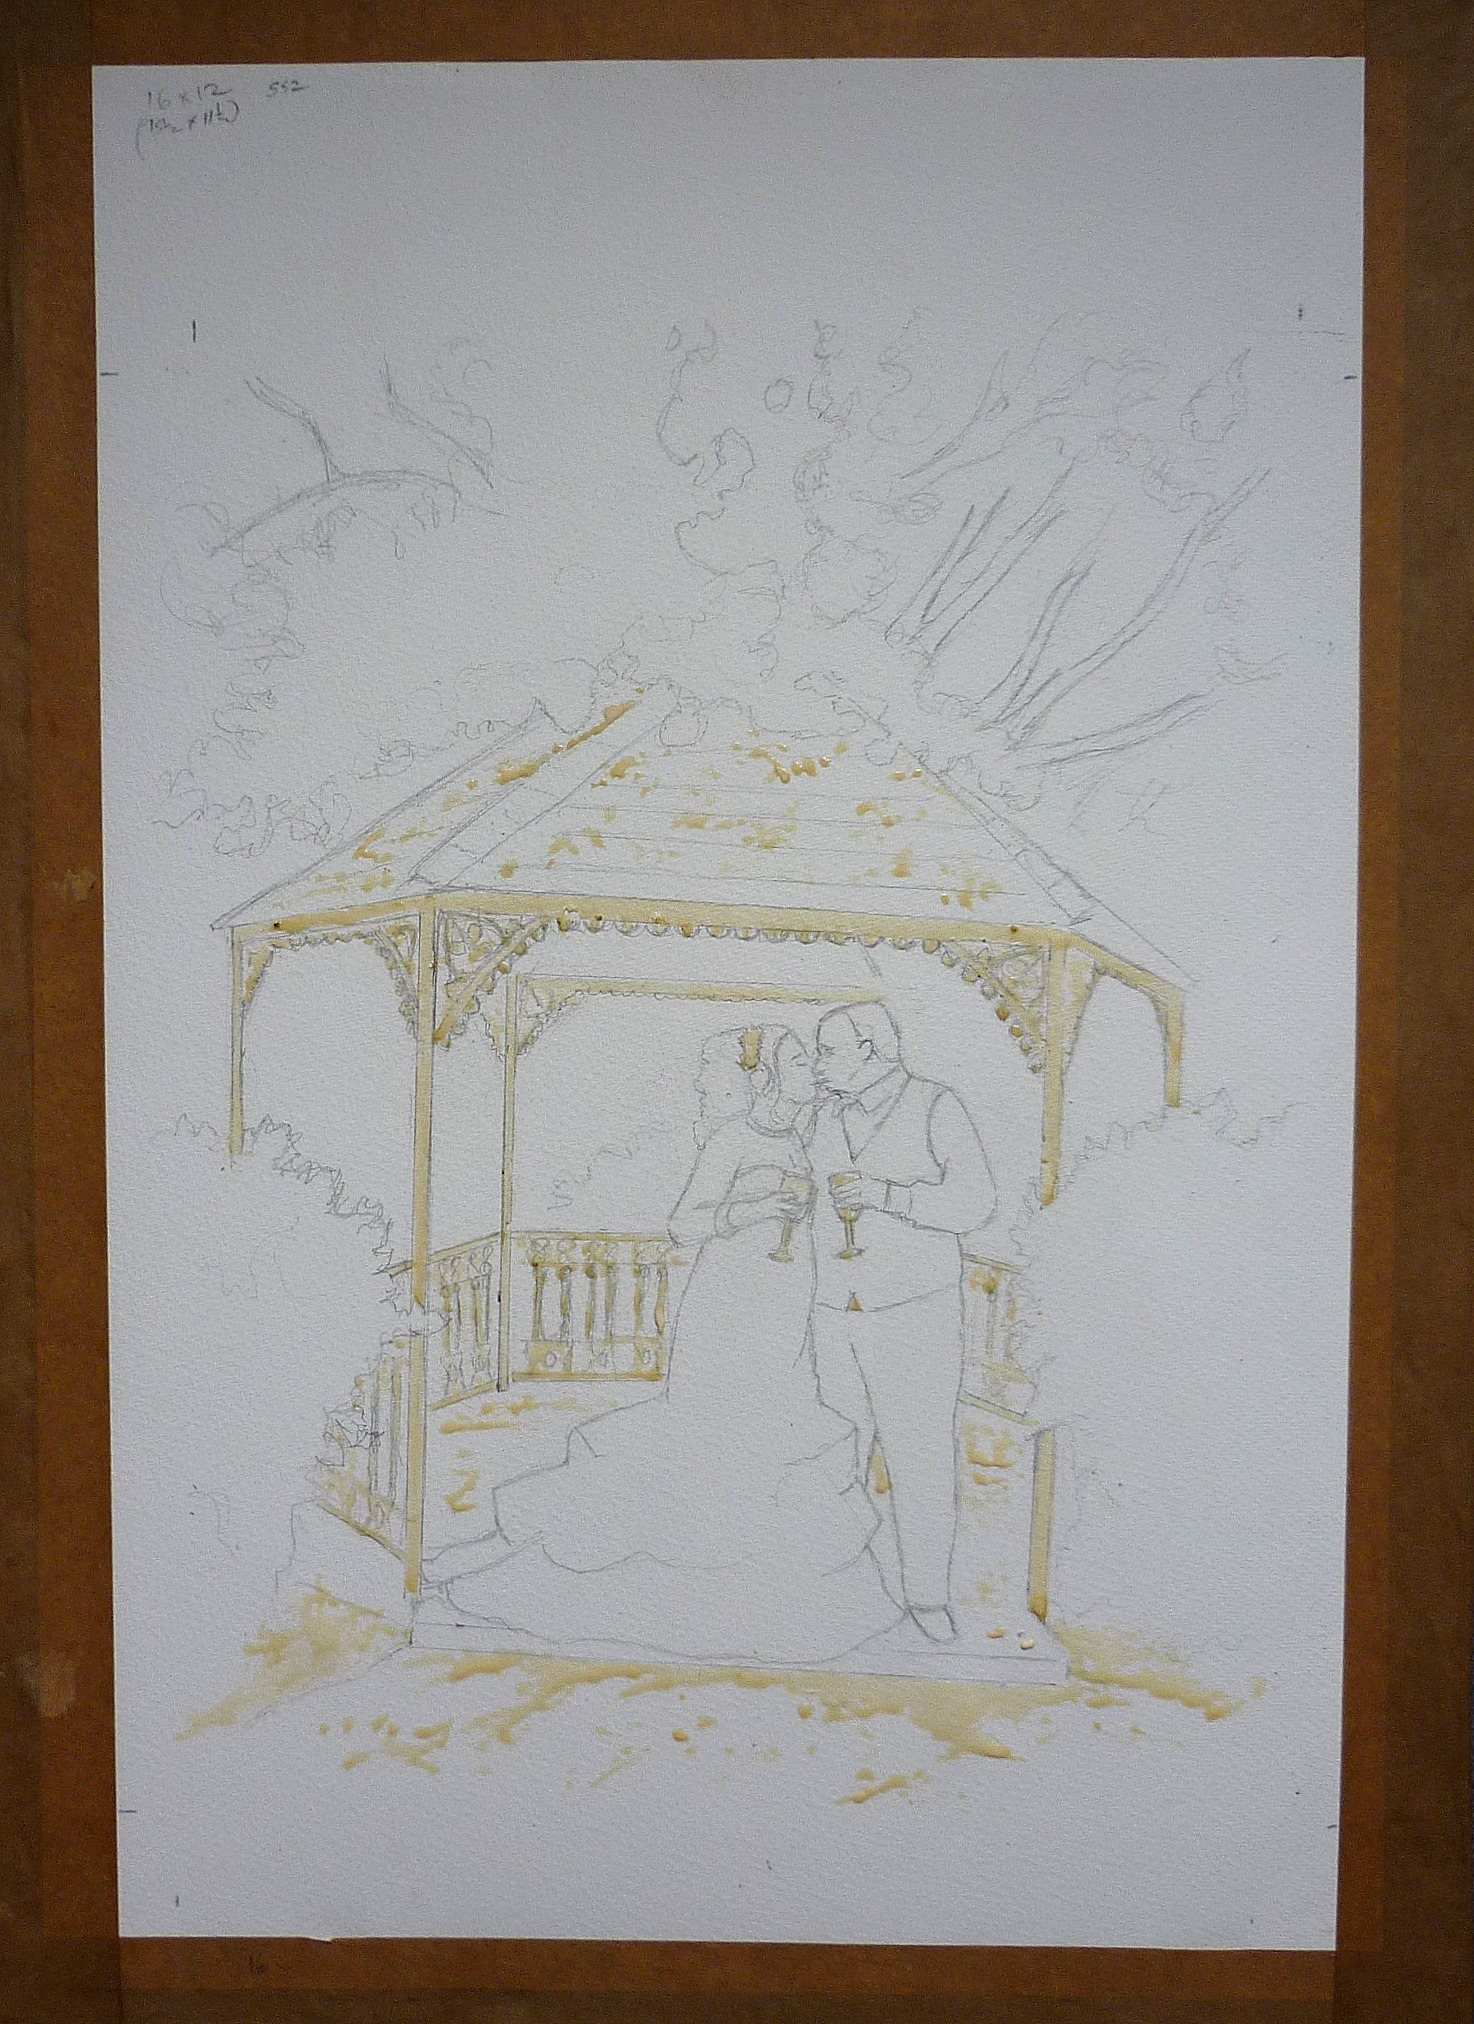
 Then I applied the masking fluid with a small brush. Since this painting has a lot of white in it for the gazebo and the brides dress, and pale pink for the fallen cherry blossom I wanted to make sure I kept those delicate colours from the darker ones around them, and masking fluid meant that I was protecting those parts of the paper.
Now to start painting, and I made a delicate wash of pink for the cherry blossom, and very delicate palest blue for the sky behind it, and small amounts of green gold and browns for the main tree branches, and the dark greens of conifer tree adding contrast. I let the paint flow down the paper behind the gazebo adding a pale harmonious look to the background. And purposely lost some of edges of the gazebo interior under the roof to soften the structure.
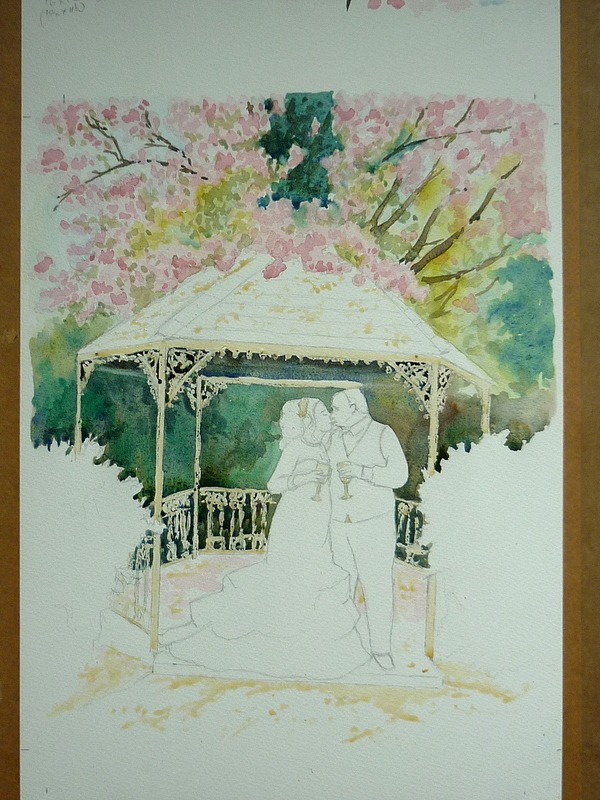
Next was the foreground, with the pale purple greys of the slabs, the roof of the gazebo and the warmer greens to the side of the gazebo. There was no need for much detail here, since they were all to add depth to the picture.

Now it was time to remove the masking fluid revealing the white paper below, and add palest washes for the white gazebo, and cherry blossom.
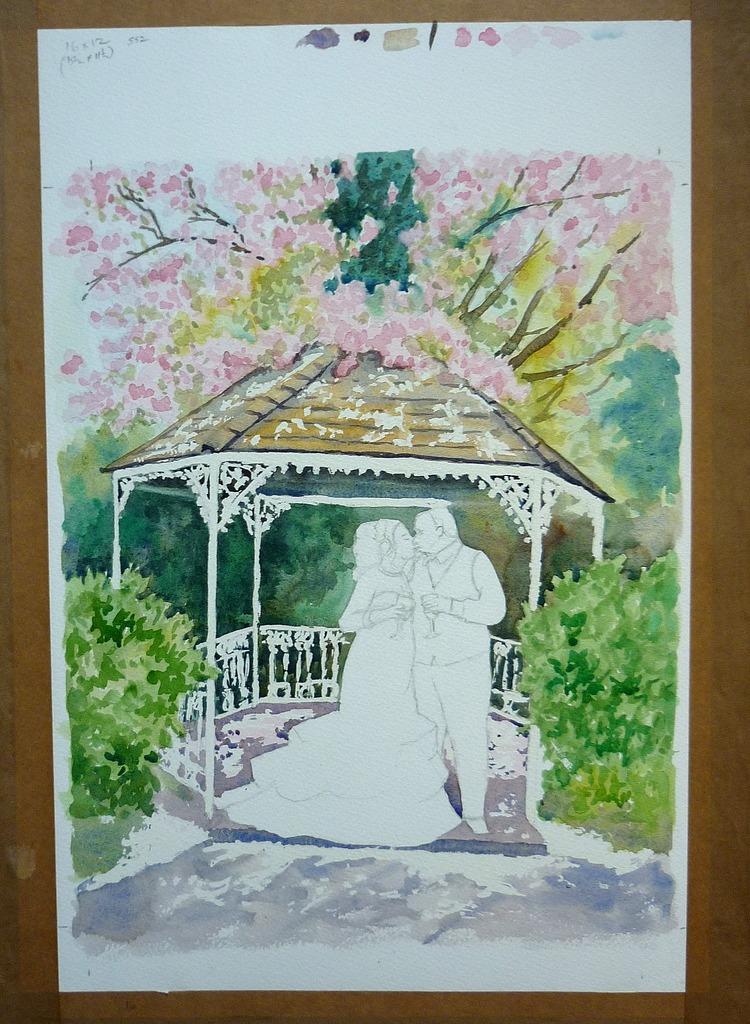
Happy that the background was in, I could now concentrate on the bride and groom, and painted the first wash of colours to his suit, and her dress, letting the white of the paper be the colour of her gorgeous gown and only hinting at the subtle shadows of the fine fabric. I painted their wine glasses – a gorgeous contrast of her red wine against her white dress, and his white wine against his dark blue suit.
Then it was time to pull the whole thing together, adding fine details around them where necessary in the foliage to the side of them, and behind them in the gazebo, and of course the bride and grooms faces.

Finished, the whole thing looks so much better in a mount, completed. The title of it is “Cherry blossom gazebo kiss” – it says it all! Delicate but with good strong contrasts in small places to add depth to the gazebo ironwork, and the garden setting. I love it!
Jackie Adshead looks absolutely fantastic can’t wait to see it in person. Thank you once again xx
My pleasure Jim! I’m so delighted you think so, and I can’t wait for you both to see it properly! I loved painting it for you both, on such a gorgeous wedding day – it was a joy to do xx
Jim Grieves liked this on Facebook.
Stephen Harding liked this on Facebook.
Pippa Scott liked this on Facebook.
Natalie Coward liked this on Facebook.
Adrian DiMetriou liked this on Facebook.
Comments are closed.